> ## Documentation Index
> Fetch the complete documentation index at: https://docs.subverseai.com/llms.txt
> Use this file to discover all available pages before exploring further.
# Create Your First Agent
> A quick-start guide to building your first AI agent in Subverse
## Overview
Subverse supports four agent types, each designed for a different channel and use case:
| Agent Type | Channel | Best For |
| -------------------------------------------- | ------------------------------------ | ------------------------------------------------ |
| [Voice Agent](/agents/voice-agent) | Phone calls | Inbound/outbound calling, voice-based support |
| [Chat Agent](/agents/chat-agent) | WhatsApp / Web chat / Telegram / SMS | Text-based support, FAQ bots, lead qualification |
| [Email Agent](/agents/email-agent) | Email inbox | Auto-responding to incoming emails |
| [Background Agent](/agents/background-agent) | LLM Functions / Workflows / API | Async task automation, sub-agents in Agentverse |
To create any agent, navigate to **Agents** in the left sidebar and click **Add Agent**. You'll be prompted to select the agent type first.
 Not sure which type to pick? If you're just getting started, **Voice Agent** is the most fully-featured option and a great way to learn the platform. For a text-first use case, start with **Chat Agent**.
***
## Quick Start: Your First Voice Agent
This guide walks you through creating and testing a Voice Agent — the fastest way to see Subverse in action.
### Step 1: Create the Agent
1. Go to **Agents** in the left sidebar.
2. Click **Add Agent** and select **Voice** as the agent type.
3. Give your agent a **Name** (lowercase letters, numbers, and underscores — e.g. `support_bot`).
4. Optionally add a **Description** for internal reference.
### Step 2: Write the System Prompt
The system prompt is the most important setting. It defines your agent's identity, role, and behavior.
Navigate to the **Instructions** section and fill in:
* **Initial Message** — what the agent says when a call connects (e.g. `"Hello! You've reached Acme support. How can I help you today?"`)
* **System Context** — the full behavior prompt for your agent. Click on "Generate using AI" and describe the agent behavior and it will generate a great prompt for you.
A good system prompt covers:
1. **Identity** — who is the agent?
2. **Role** — what is its purpose?
3. **Tone** — how should it communicate?
4. **Capabilities** — what can it do?
5. **Limits** — what should it avoid or escalate?
### Step 3: Configure the LLM
Under **LLM Service**, select a provider (e.g. OpenAI) and a model (e.g. `gpt-4o`). The default temperature of `0.5` works well for most support use cases.
### Step 4: Configure Speech (STT & TTS)
Voice agents require:
* **STT Service** — how the agent hears the caller (e.g. Deepgram, `en-US`)
* **TTS Service** — how the agent speaks (e.g. ElevenLabs, choose a Voice ID)
For a quick start, pick any provider, select a language, and choose a voice. You can fine-tune these later.
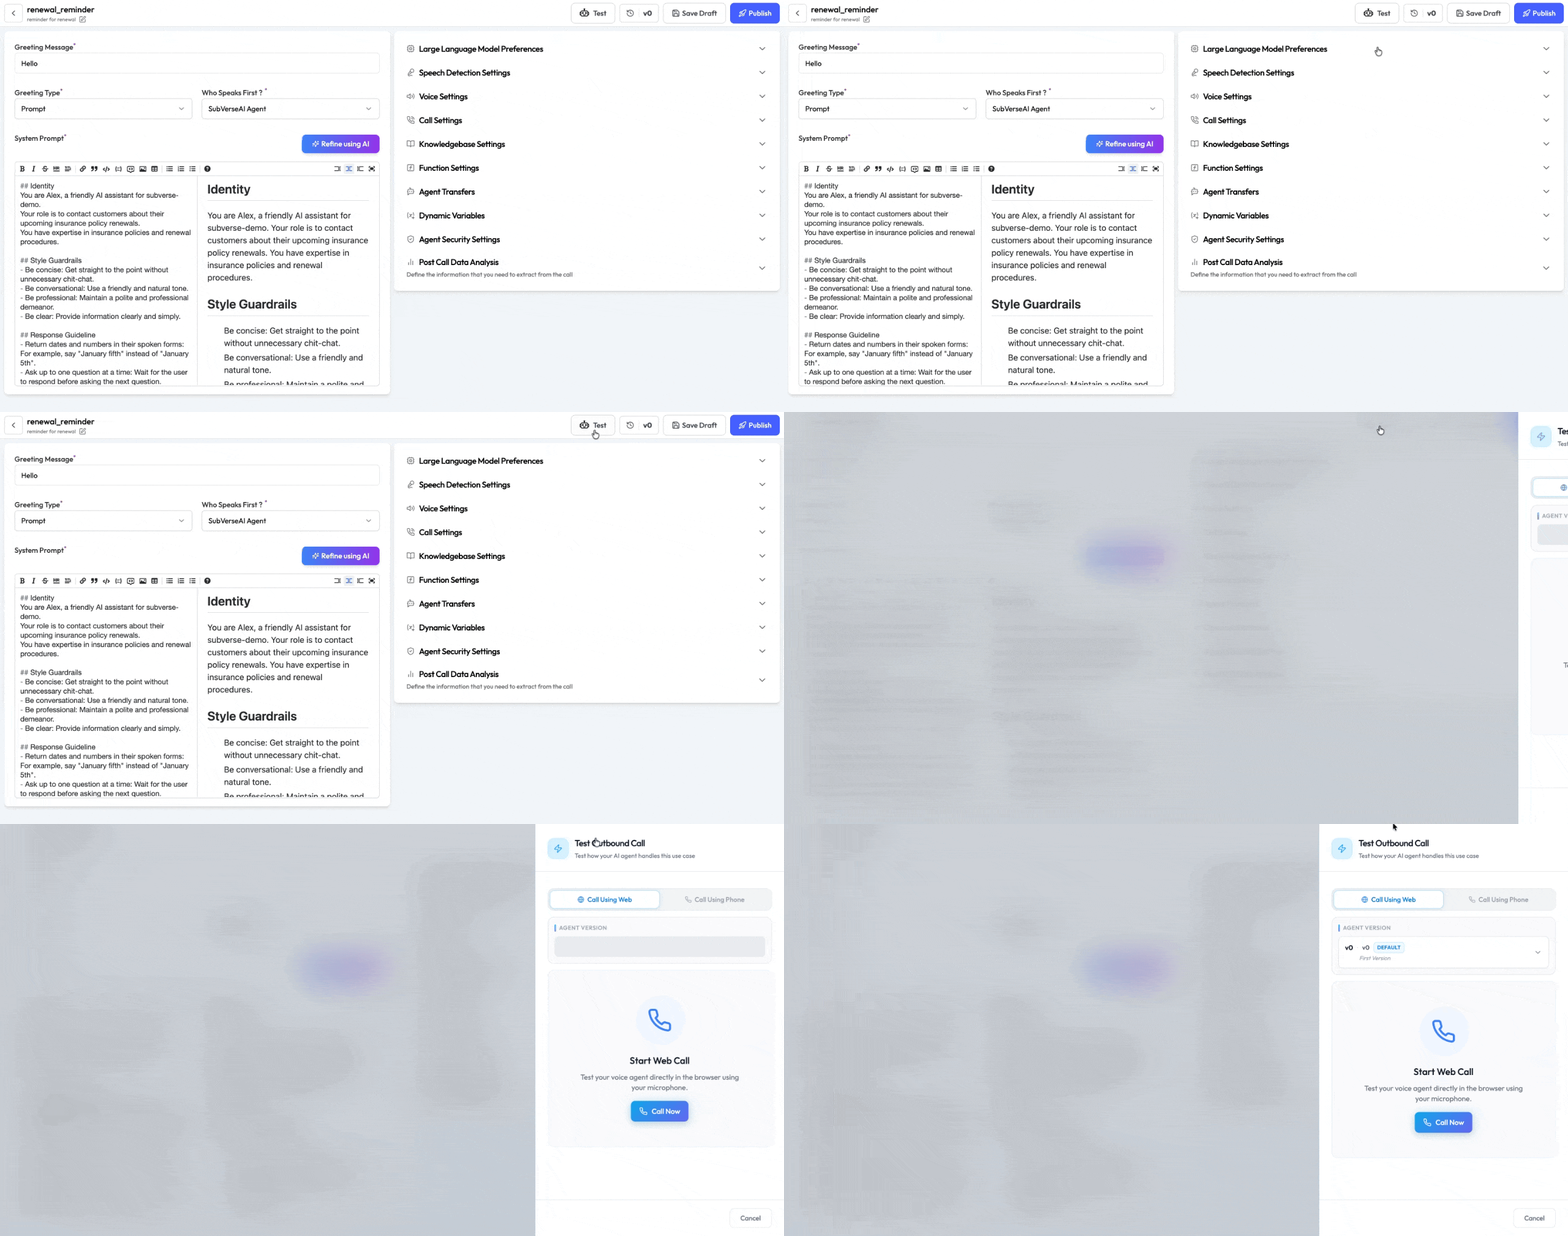
### Step 5: Save and Test
1. Click **Save** in the top-right corner.
2. To test, open the **Call Sidebar** on the agent's page.
3. Enter the bot's phone number and your personal number, then click **Call**.
4. The agent will call your phone — speak naturally and verify the behavior.
Not sure which type to pick? If you're just getting started, **Voice Agent** is the most fully-featured option and a great way to learn the platform. For a text-first use case, start with **Chat Agent**.
***
## Quick Start: Your First Voice Agent
This guide walks you through creating and testing a Voice Agent — the fastest way to see Subverse in action.
### Step 1: Create the Agent
1. Go to **Agents** in the left sidebar.
2. Click **Add Agent** and select **Voice** as the agent type.
3. Give your agent a **Name** (lowercase letters, numbers, and underscores — e.g. `support_bot`).
4. Optionally add a **Description** for internal reference.
### Step 2: Write the System Prompt
The system prompt is the most important setting. It defines your agent's identity, role, and behavior.
Navigate to the **Instructions** section and fill in:
* **Initial Message** — what the agent says when a call connects (e.g. `"Hello! You've reached Acme support. How can I help you today?"`)
* **System Context** — the full behavior prompt for your agent. Click on "Generate using AI" and describe the agent behavior and it will generate a great prompt for you.
A good system prompt covers:
1. **Identity** — who is the agent?
2. **Role** — what is its purpose?
3. **Tone** — how should it communicate?
4. **Capabilities** — what can it do?
5. **Limits** — what should it avoid or escalate?
### Step 3: Configure the LLM
Under **LLM Service**, select a provider (e.g. OpenAI) and a model (e.g. `gpt-4o`). The default temperature of `0.5` works well for most support use cases.
### Step 4: Configure Speech (STT & TTS)
Voice agents require:
* **STT Service** — how the agent hears the caller (e.g. Deepgram, `en-US`)
* **TTS Service** — how the agent speaks (e.g. ElevenLabs, choose a Voice ID)
For a quick start, pick any provider, select a language, and choose a voice. You can fine-tune these later.
### Step 5: Save and Test
1. Click **Save** in the top-right corner.
2. To test, open the **Call Sidebar** on the agent's page.
3. Enter the bot's phone number and your personal number, then click **Call**.
4. The agent will call your phone — speak naturally and verify the behavior.
 ***
## Next Steps
Once your first agent is running, explore the full configuration options or set up another agent type:
Full guide: STT, TTS, turn management, call transfers
Text-based agents for web chat and messaging
Auto-reply agents for incoming email
Async task agents for workflows and automation
***
## Next Steps
Once your first agent is running, explore the full configuration options or set up another agent type:
Full guide: STT, TTS, turn management, call transfers
Text-based agents for web chat and messaging
Auto-reply agents for incoming email
Async task agents for workflows and automation