> ## Documentation Index
> Fetch the complete documentation index at: https://docs.subverseai.com/llms.txt
> Use this file to discover all available pages before exploring further.
# Voice Agent
> Build an AI agent that makes and receives phone calls
## Overview
A Voice Agent is a phone-based AI that speaks and listens in real time. It handles inbound or outbound phone calls — converting speech to text (STT), processing the caller's intent with an LLM, and responding with synthesized speech (TTS).
Voice agents include fine-grained controls for speech detection, interruption handling, turn-taking, call transfers, and ambient audio.
**When to use a Voice Agent:**
* You want an AI that can make or receive phone calls
* You need voice-based customer support, appointment booking, or outbound calling
* Your use case requires real-time speech interaction
***
## How to Create
1. Navigate to **Agents** in the left sidebar.
2. Click **Add Agent** and select **Voice** as the agent type.
3. Fill in the **Identity** fields — name and description.
4. Write the agent's system prompt under **Instructions**.
5. Configure the **LLM Service** (provider and model).
6. Configure the **STT Service** (speech-to-text provider and language).
7. Configure the **TTS Service** (voice provider and voice ID).
8. Configure **Turn Management** — how the agent detects when the caller has finished speaking.
9. Optionally configure **Call Settings**, **Pipeline Settings**, **Functions**, and **Analytics**.
10. Click **Save**.
***
## Deploy: Connect to a Phone Number
A saved Voice Agent can be tested from the dashboard immediately, but to handle real inbound or outbound calls you need to connect it to a **Voice Channel**.
A Voice Channel uses a SIP trunk to link your agent to a real phone number. Subverse supports both inbound (receive calls) and outbound (make calls) trunks.
Configure an inbound or outbound SIP trunk and link it to this agent
Create the SIP credential required to authenticate your trunk
***
## How to Test
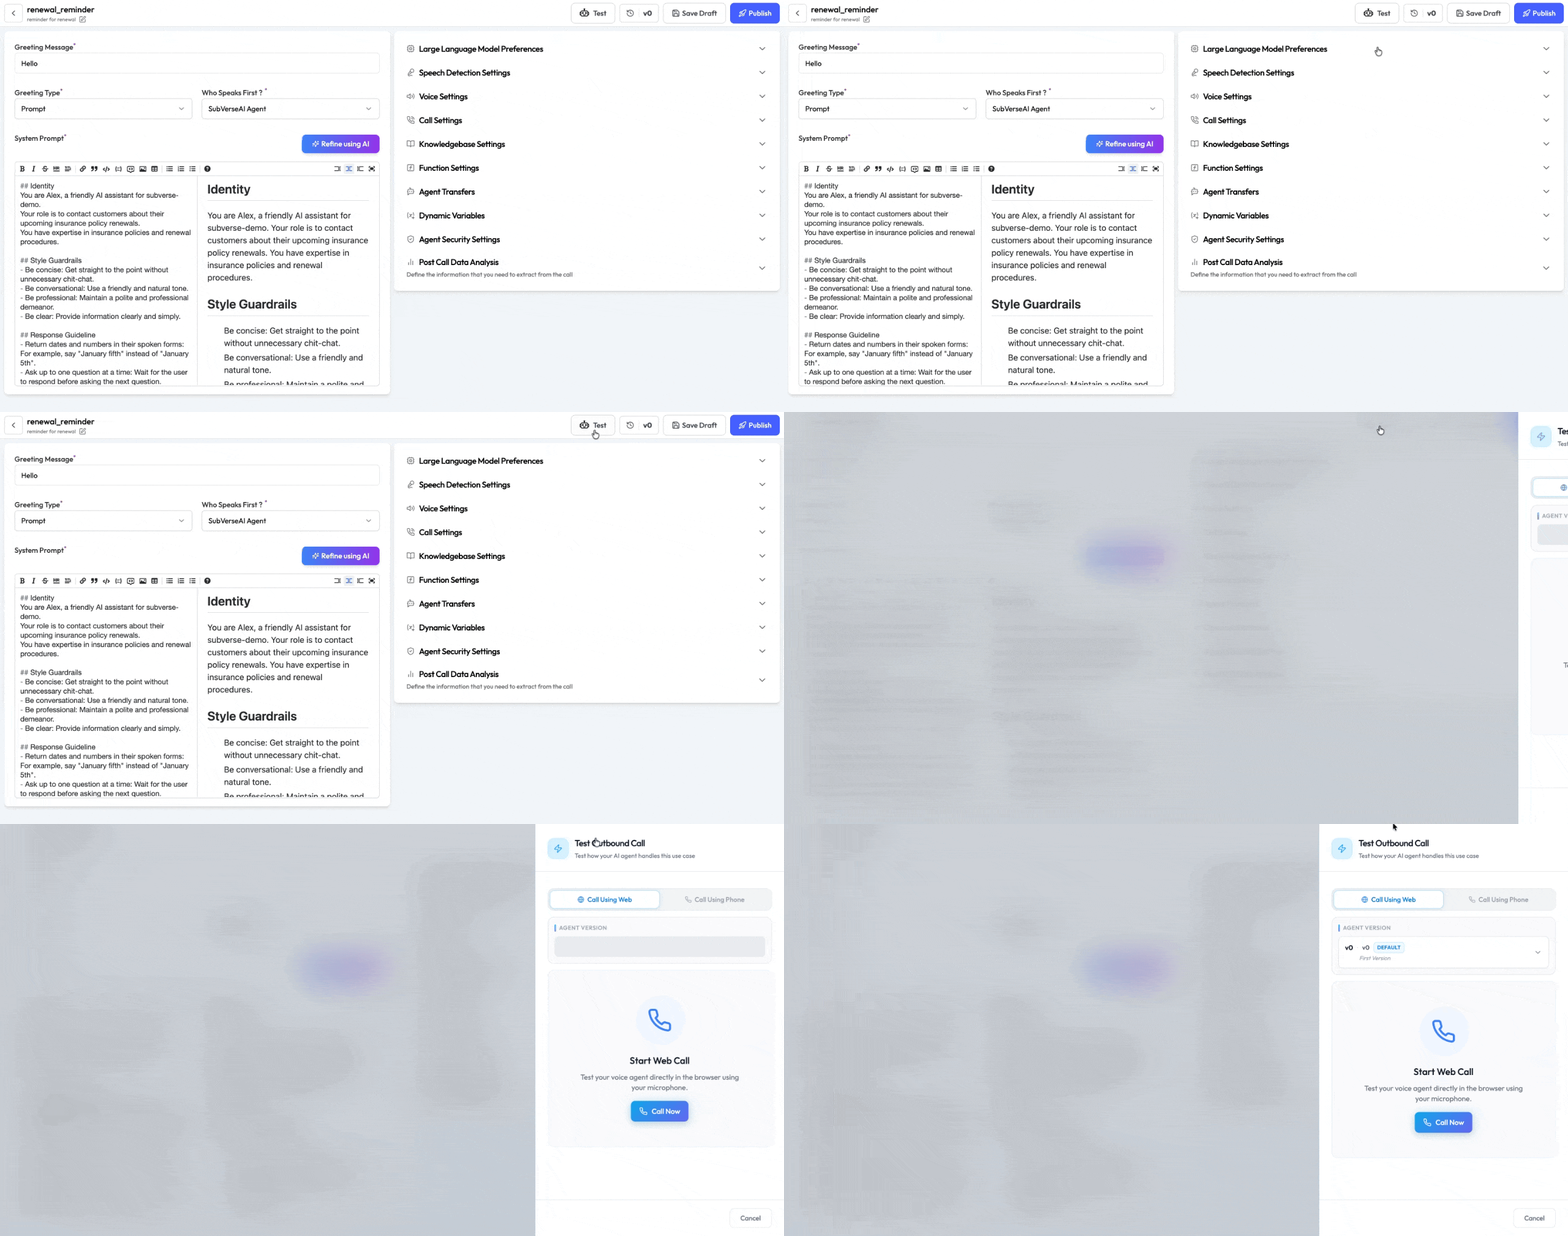
1. Open the agent from the **Agents** list.
2. Click the **Call** icon to open the **Call Sidebar**.
3. Enter the bot's phone number and your personal phone number.
4. Click **Call** — the agent places an outbound call to your number.
5. Speak naturally and test the conversation flow.
6. Check the call log and transcript after the call ends.
 ***
## Tips & Notes
* **Endpointing vs Responsiveness:** Endpointing controls the silence gap before responding; Responsiveness controls the overall speed of the pipeline. Lower both for a faster-feeling agent.
* **Preemptive Generation:** Leave this on for most use cases — it significantly reduces perceived latency. Only disable it if you need strict full-turn capture (e.g. customers dictating long account numbers).
* **Turn Detection:** Start with `STT` for most cases. Switch to `VAD` if users frequently complain of being cut off.
* **Warm Transfer:** Always pair a warm transfer with a clear `Warm Transfer Prompt` so the receiving person understands the context.
* **Backchannel:** Recommended for longer-response scenarios where the user speaks several sentences. It makes the agent feel more attentive.
* **Allow List / Block List:** Use E.164 regex patterns (e.g. `^\+1\d{10}$` to match all US numbers).
***
See the full configuration reference — every field, type, and default value
***
## Tips & Notes
* **Endpointing vs Responsiveness:** Endpointing controls the silence gap before responding; Responsiveness controls the overall speed of the pipeline. Lower both for a faster-feeling agent.
* **Preemptive Generation:** Leave this on for most use cases — it significantly reduces perceived latency. Only disable it if you need strict full-turn capture (e.g. customers dictating long account numbers).
* **Turn Detection:** Start with `STT` for most cases. Switch to `VAD` if users frequently complain of being cut off.
* **Warm Transfer:** Always pair a warm transfer with a clear `Warm Transfer Prompt` so the receiving person understands the context.
* **Backchannel:** Recommended for longer-response scenarios where the user speaks several sentences. It makes the agent feel more attentive.
* **Allow List / Block List:** Use E.164 regex patterns (e.g. `^\+1\d{10}$` to match all US numbers).
***
See the full configuration reference — every field, type, and default value